Got a New iPhone or iPad? Here’s How to Set up iCloud Email on Spike
If you just picked up a new iPhone or iPad, you’re likely going to want to set up your iCloud email on Spike. Unlike Gmail, Apple doesn’t have a native third-party login window for your account, so you’ll likely need to set up an app-specific password with iCloud to add your email.
Generate an App-specific Password for Spike
To generate an app-specific password with iCloud for Spike, follow these handy instructions (it’ll take about five minutes):
-
Go to Apple’s Apple ID management page and sign in to your iCloud/Apple account that you want to set up with Spike to receive email.
-
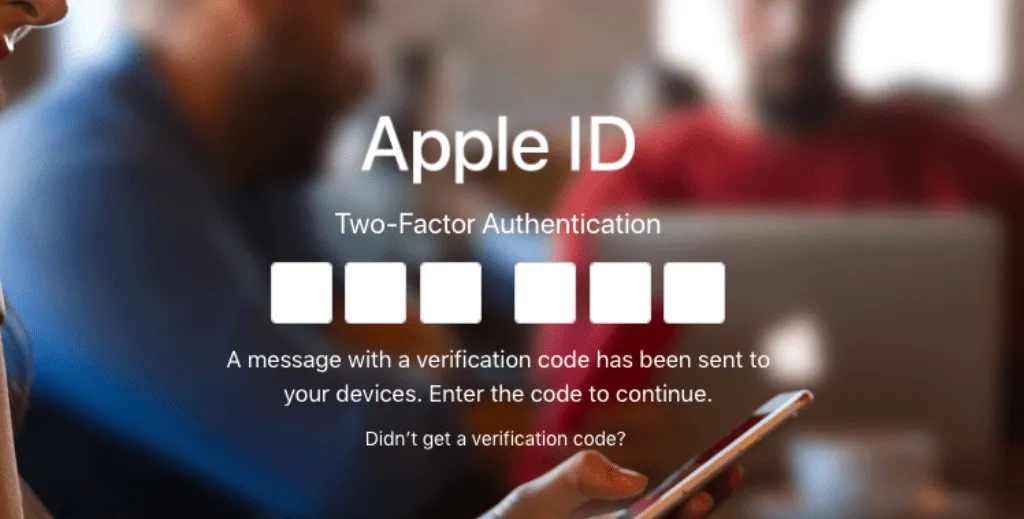
If you’ve set up Apple’s two-factor authentication, you’ll need to confirm the login on another device.
-
Confirm your identity by tapping Allow on another Apple device.
-
Enter the six-digit verification code on the Apple ID management page to log in.
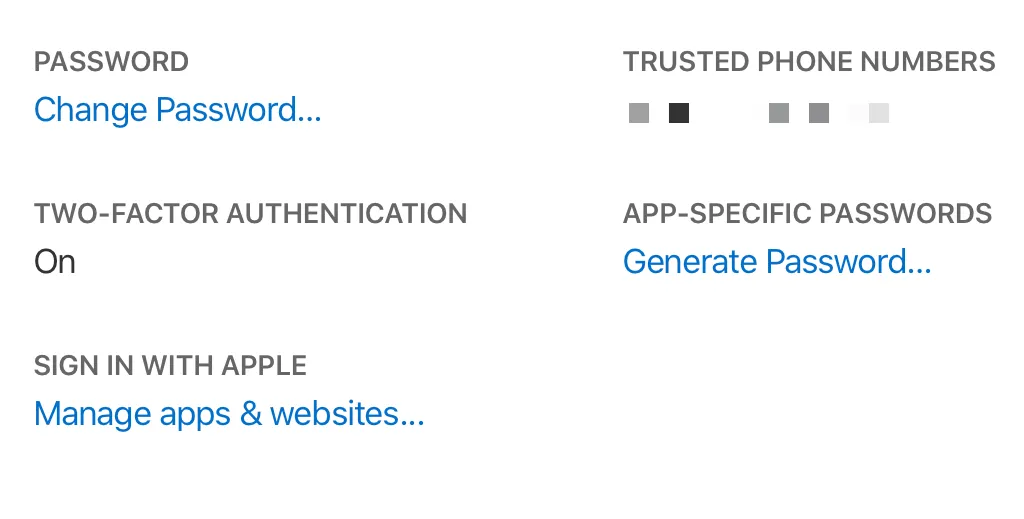
Once you’re logged into your Apple ID portal on Apple’s website, you’re going to look for Generate Password… under App-Specific Passwords. Once you click on that link, you’ll need to give the app field a descriptive name, so you recognize it in the future. In this example, we’ve chosen Spike for Mac to indicate we’re creating an app-specific password for Spike on Mac. If you were logging into Spike on the iPhone or iPad, you’d want to use Spike for iPhone or Spike for iPad. These names don’t have any effect on your ability to log in. It’s just for reference purposes.
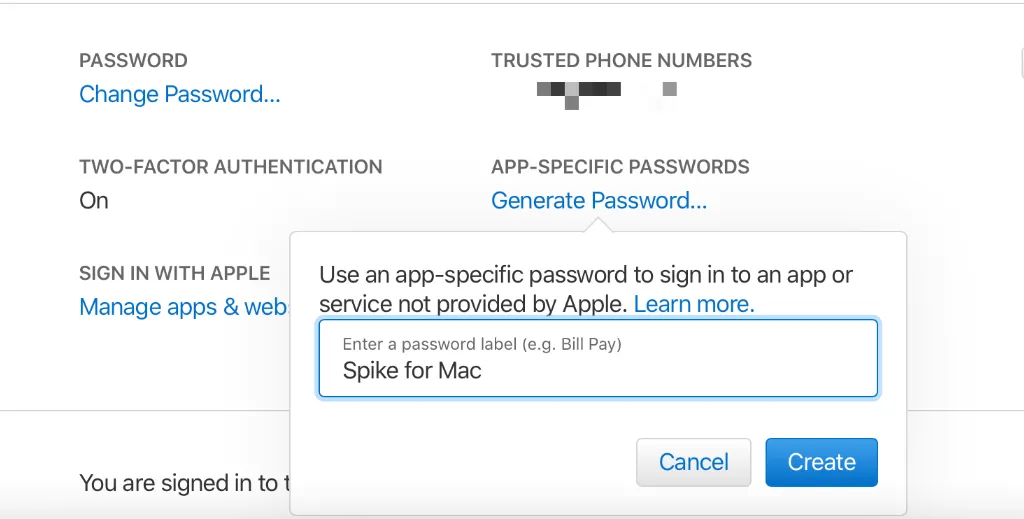
After you have generated your App-specific Password on Apple’s Manage your Apple ID portal, you’ll want to copy and paste it into a quick note so you can access it in the following steps when adding your iCloud account to Spike. Once you’ve successfully logged in, you’ll want to discard the note with the password.
Add iCloud Email to Spike
-
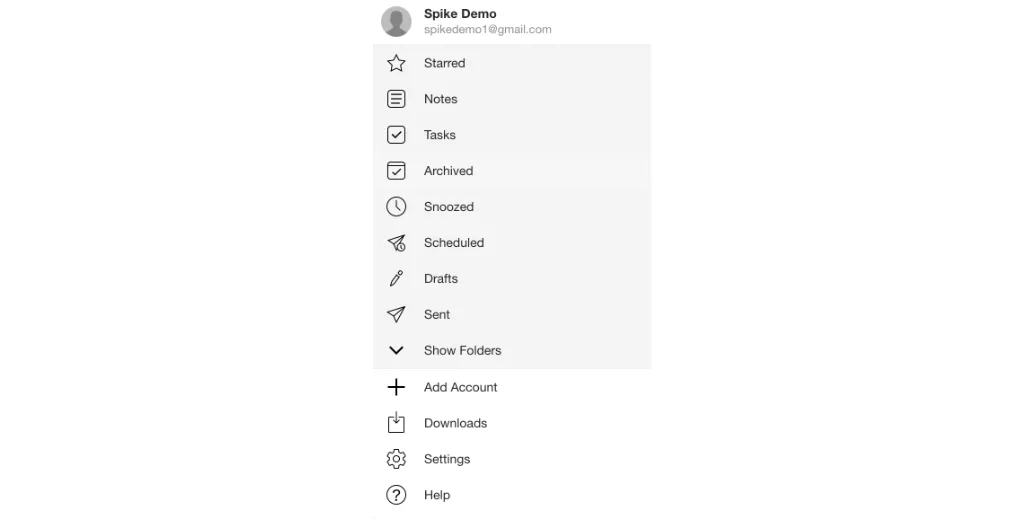
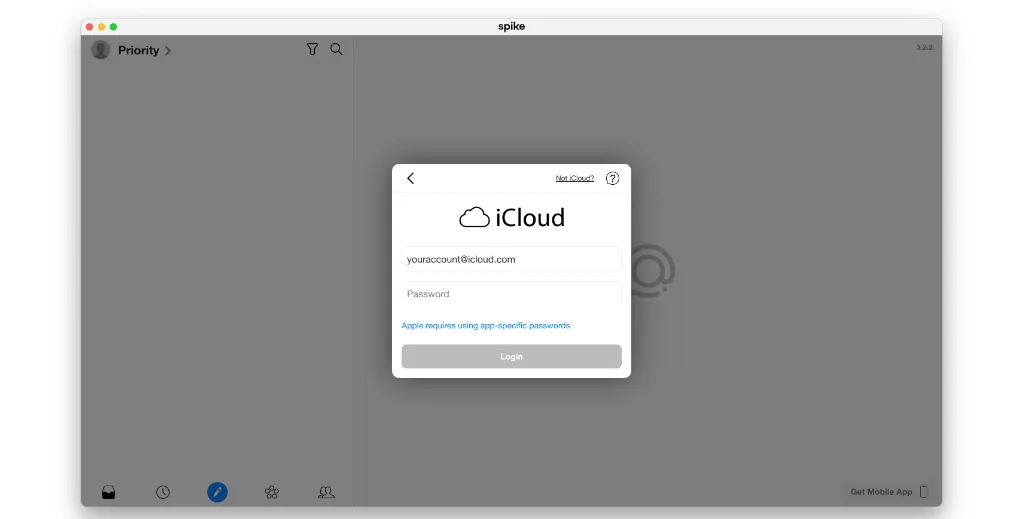
If you haven’t already, you’ll want to download Spike for Mac and Spike for iOS. Once you’ve got Spike installed on your Mac, you’ll want to look for the Add Account button under the Spike main menu.
-
Tap on Add Account to enter your iCloud email address into the box that pops up. You’ll enter the app-specific password that we copied down earlier and then click on Login on the next screen.
-
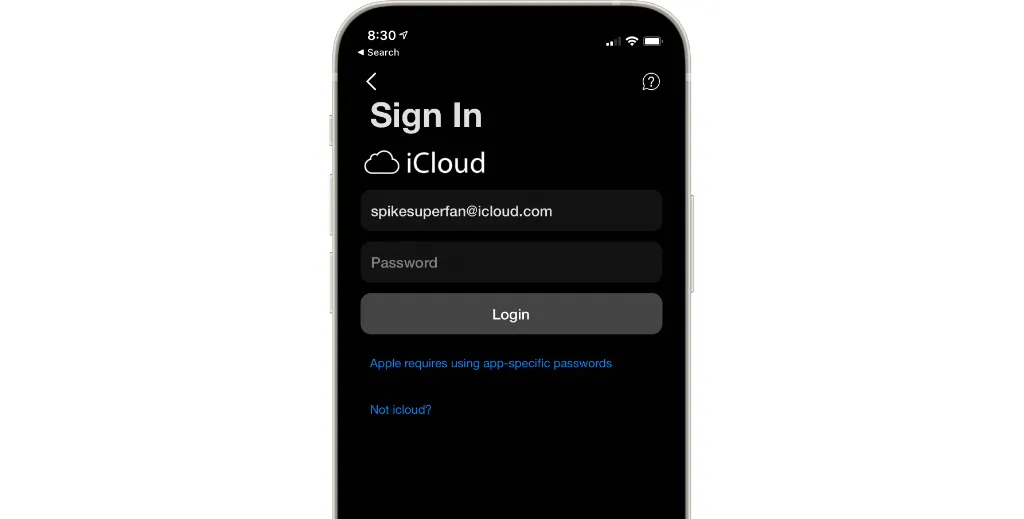
Once you have Spike for iOS installed, you’ll want to tap on the Spike icon in the top left and click on Add Account once again. You’ll see a familiar screen from the Mac where you can paste in your app-specific password again. Like before, once you’ve logged in, be sure to discard the note where the iCloud app-specific password is saved.
-
As soon as you’re signed into Spike on all of your Apple devices, you’ll stay signed in, so you won’t need to repeat this process again unless you accidentally sign out or upgrade devices in the future.
You can now use your iCloud account on Spike to receive all of your @icloud, @mac, and @me email, and chat with people using Spike’s chat-like messenger interface. What’s more is that you can also start unlocking all of Spike’s superpowers like Spike’s online and collaborative Notes, a merged calendar, Spike Groups, and more. Spike starts just like your previous email app that can consolidate all of your email accounts, but it ends up being a complete digital workspace that can manage projects, become your task tracker, your video chat hub, and more.
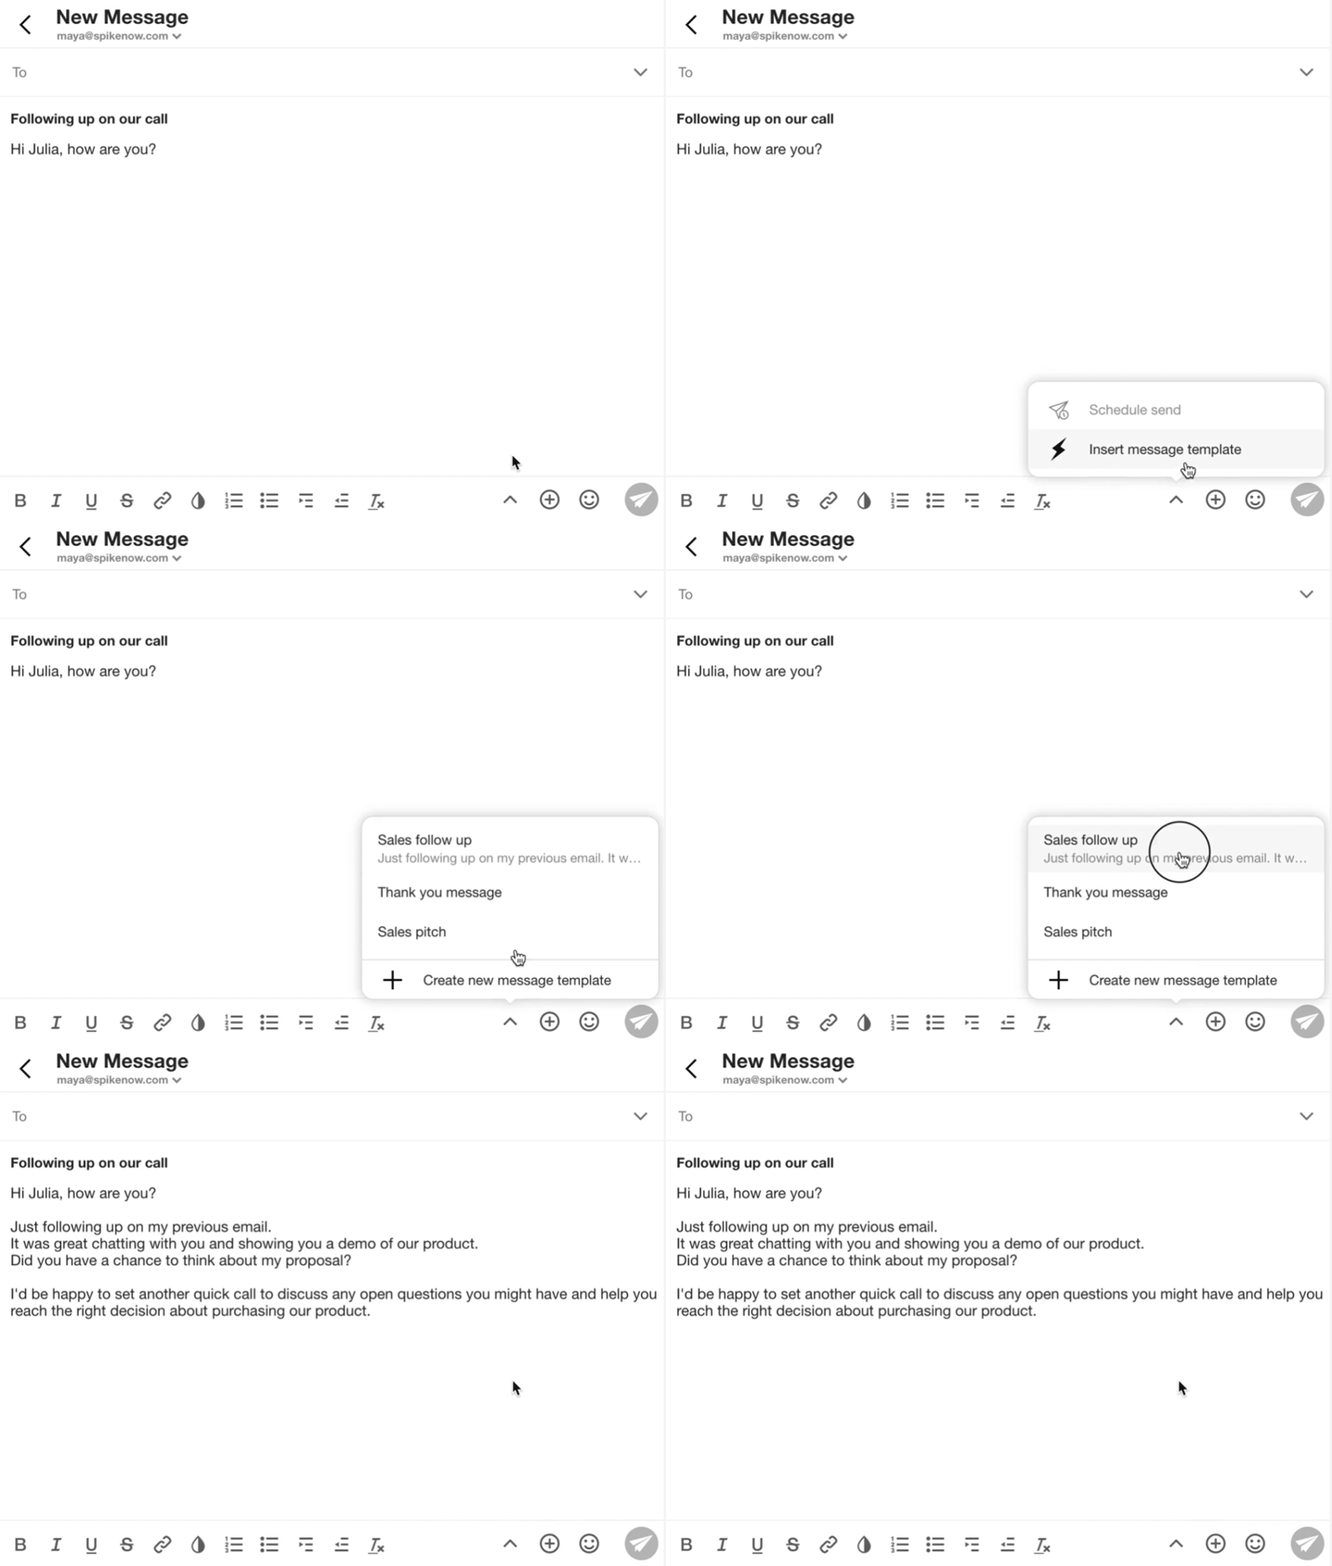
Take a look around the app, and go ahead and set up a few message templates for your iCloud email. With Spike Message Templates, you can take anything you routinely email and create a template for easy access to it each time you need to send it. Do you have a frequent response for how you reply to incoming sales pitches? What about requests for purchases? With Spike’s Message Templates feature, you can customize a canned response and use it each time you need it. Customize it to your heart’s desire, save it to your library, and then reuse it over and over.
Don’t stop your workflow by taking your hands off the keyboard, either. Spike lets you easily insert a template with keyboard shortcuts. When creating an email, simply type “/” (forward slash) to select and insert your template. Slash, enter, and done.
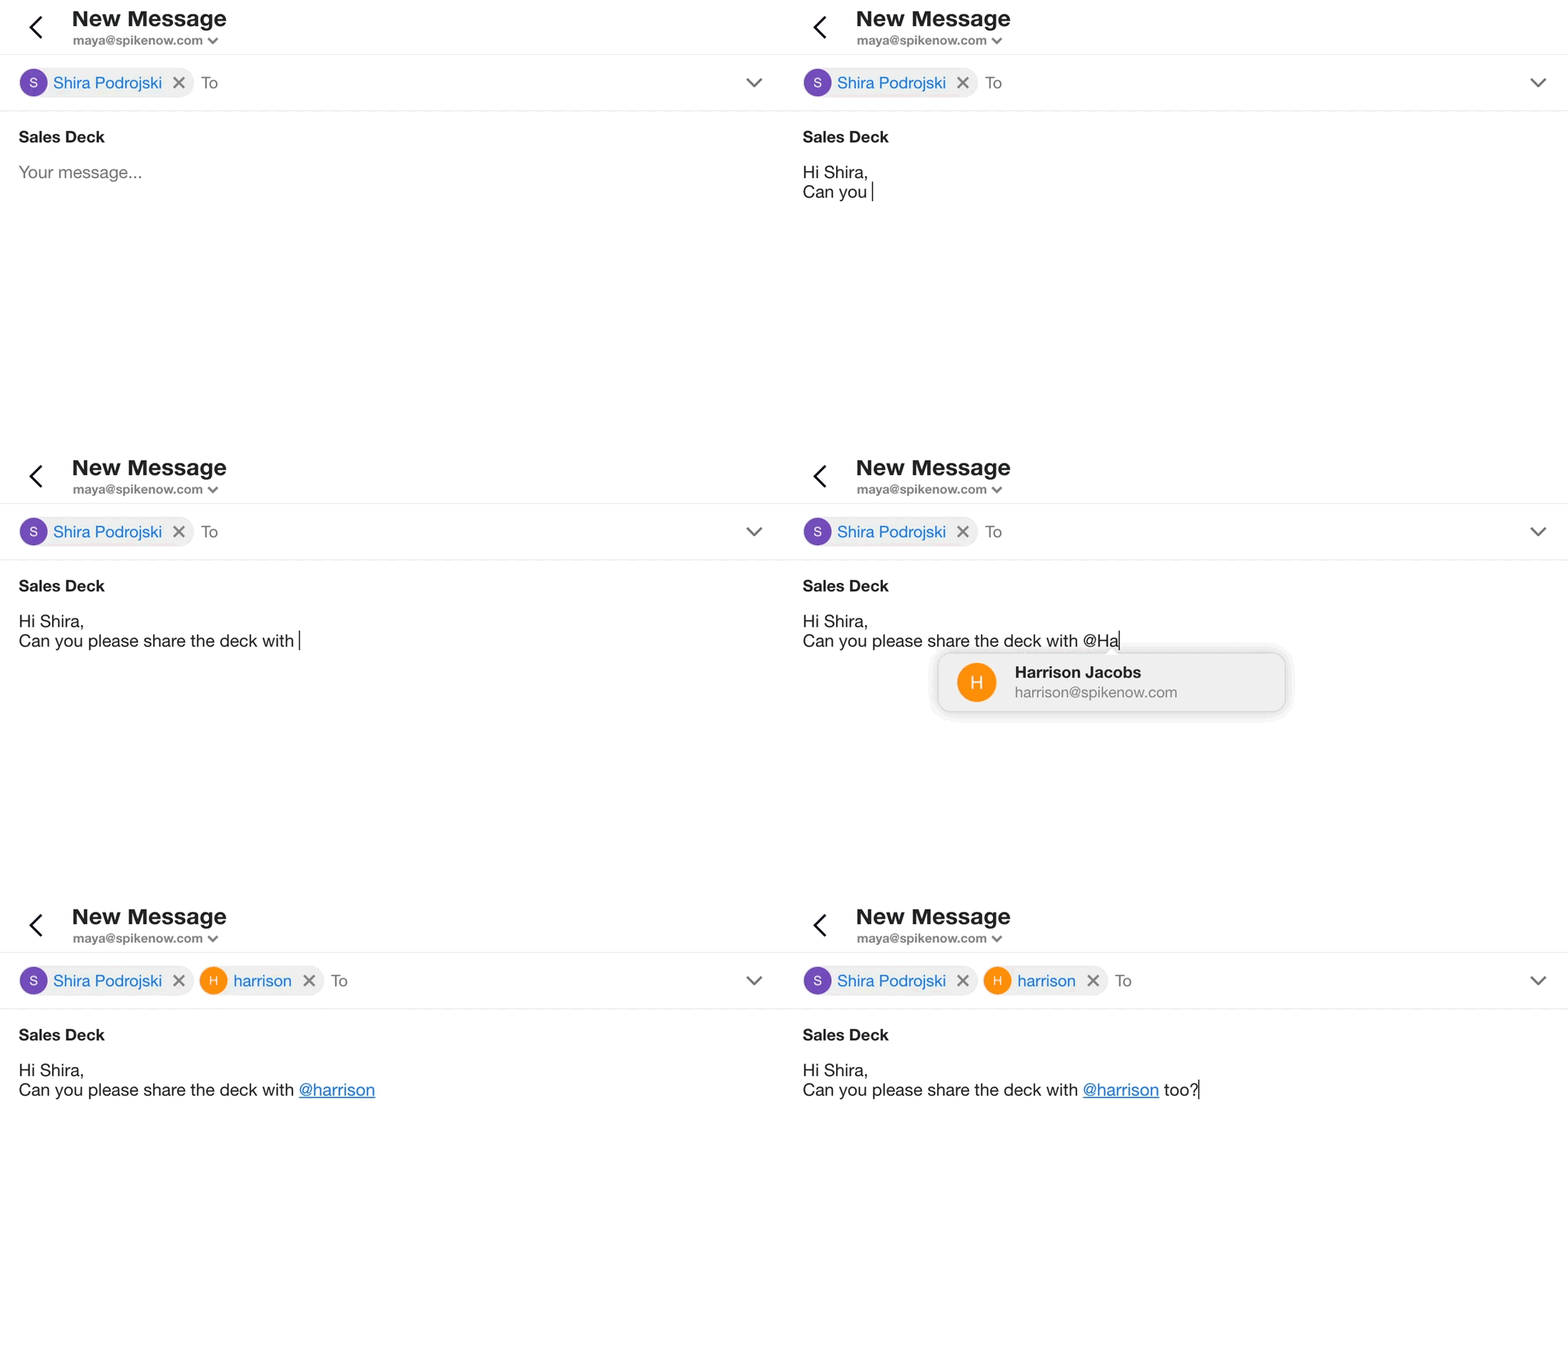
Your iCloud email in Spike also now supports @mentions. When teams are spread out across multiple time zones, your work is often asynchronous, meaning that you work at different times. If you wake up with multiple Spike Groups to look through, the @mentions will help you focus on the messages that require your attention.
All you need to do is type “@” and start typing the contact’s name. Use the arrows to select the contact and press enter (or click if you love using your mouse), and they’ll instantly be added into the conversation if they aren’t already there.
If you have more than a single email address, don’t stop at adding just your iCloud account either. Spike works with Gmail, Google Workspace, Yahoo, Outlook, and more. To add more accounts, repeat the same process of taping on the Spike icon in the left on, click Add Account and repeat the process over for as many email addresses as you have.
Revoke your App-specific Password in iCloud
If you need to revoke an app-specific password in iCloud, you’ll need to visit Apple’s Manage your Apple ID page once again and repeat the process from the beginning of logging in.
-
In the Security section of the Apple ID portal, click Edit.
-
In the app-specific passwords section, click View History.
-
Click the X next to a password you want to delete or click Revoke All to start over completely.
-
After you revoke an app-specific password assigned to Spike, it will be signed out of your account until you generate a new password and sign in again.
-
Any time you change or reset your iCloud password, all of your app-specific passwords are revoked automatically to protect the security of your Apple ID account. You’ll need to generate new app-specific passwords for any apps that you want to continue using, including Spike.


